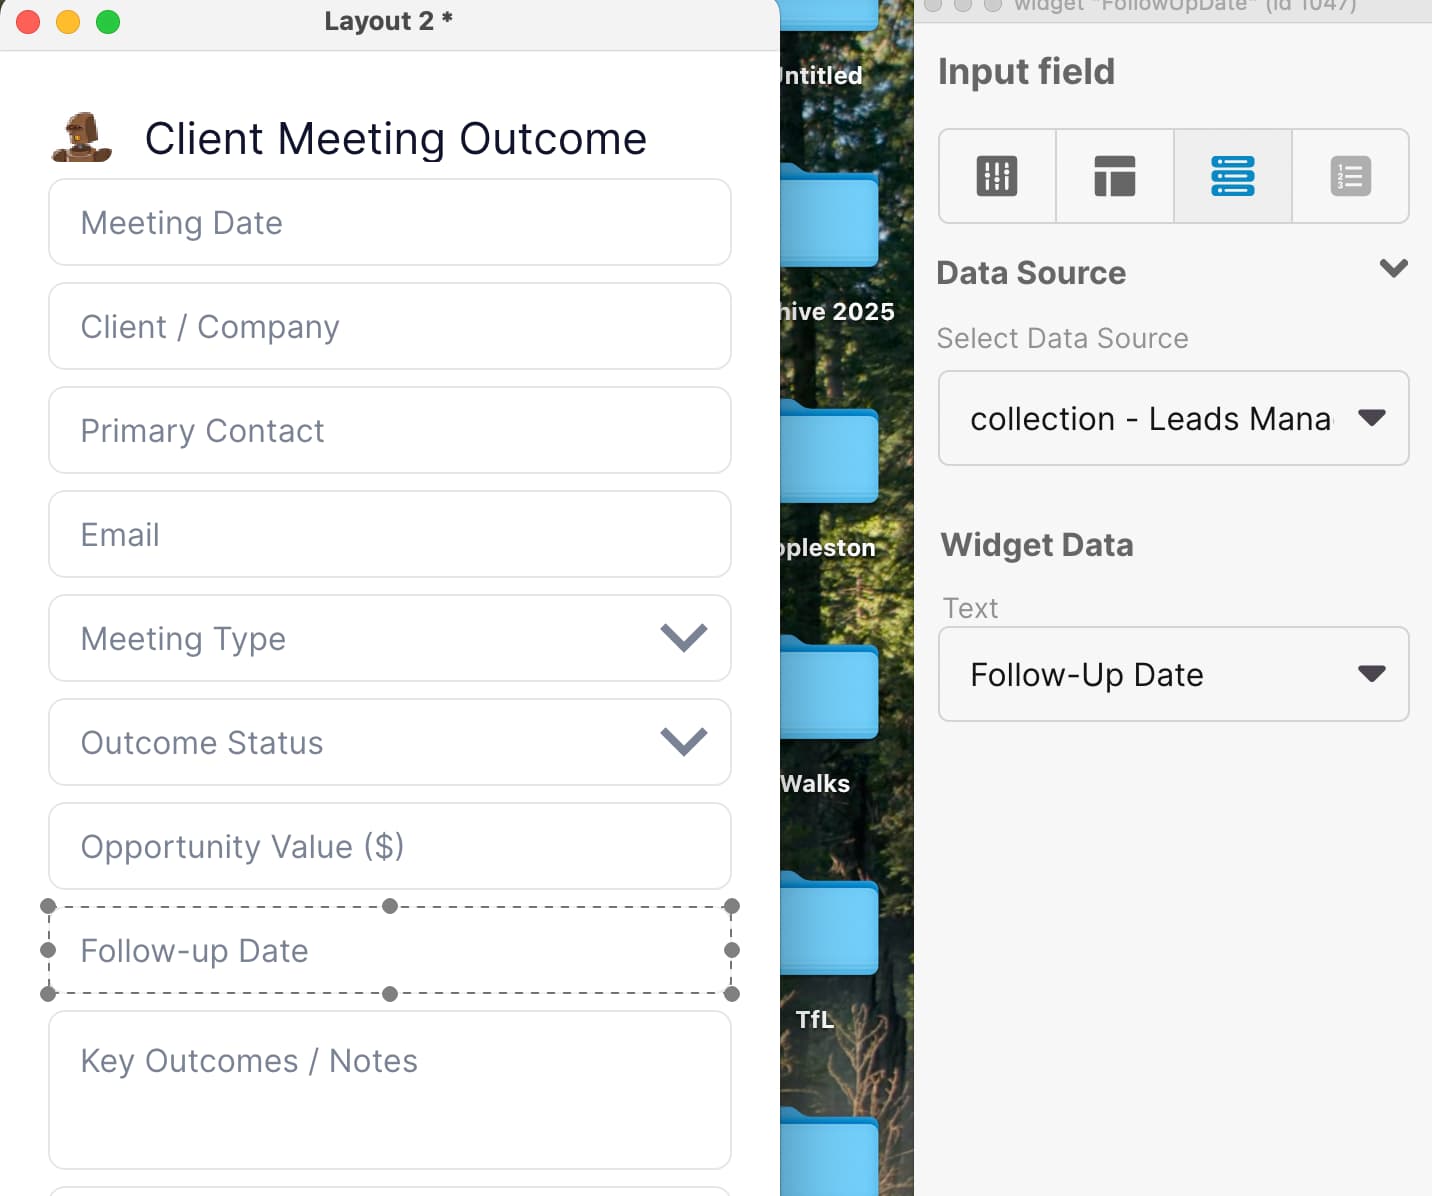
Continuing the saga of trying to add a date icon to a field (that later will be turned into a clickable icon).
So first, I have successfully done this in the past using this prompt:
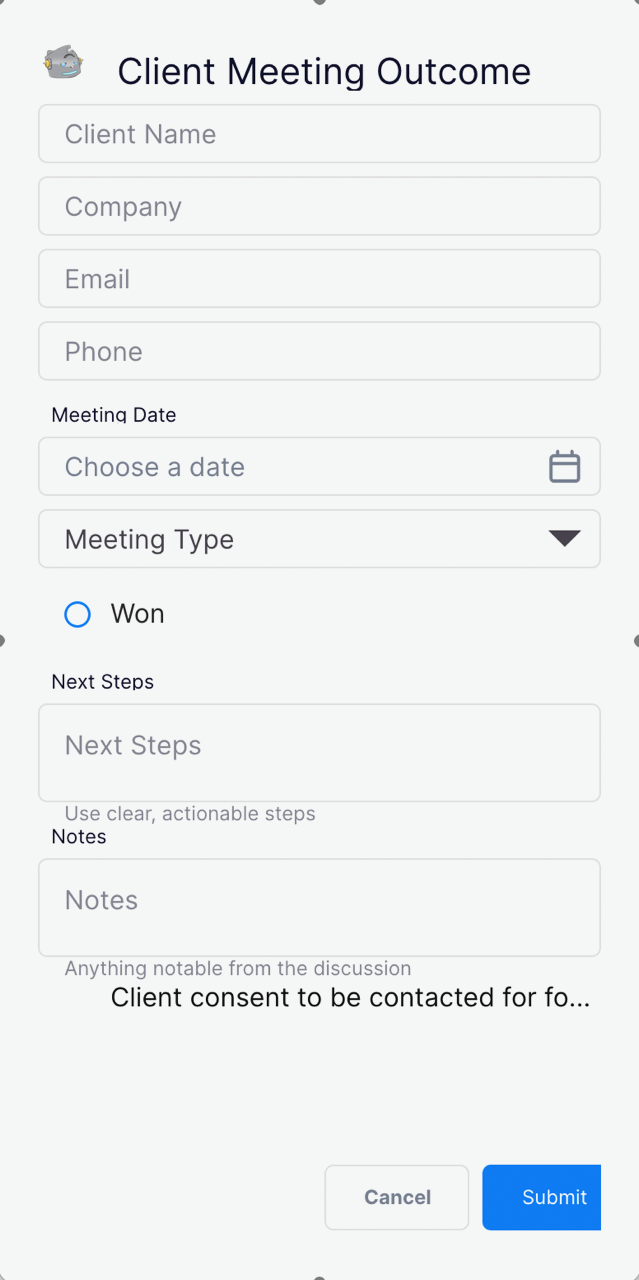
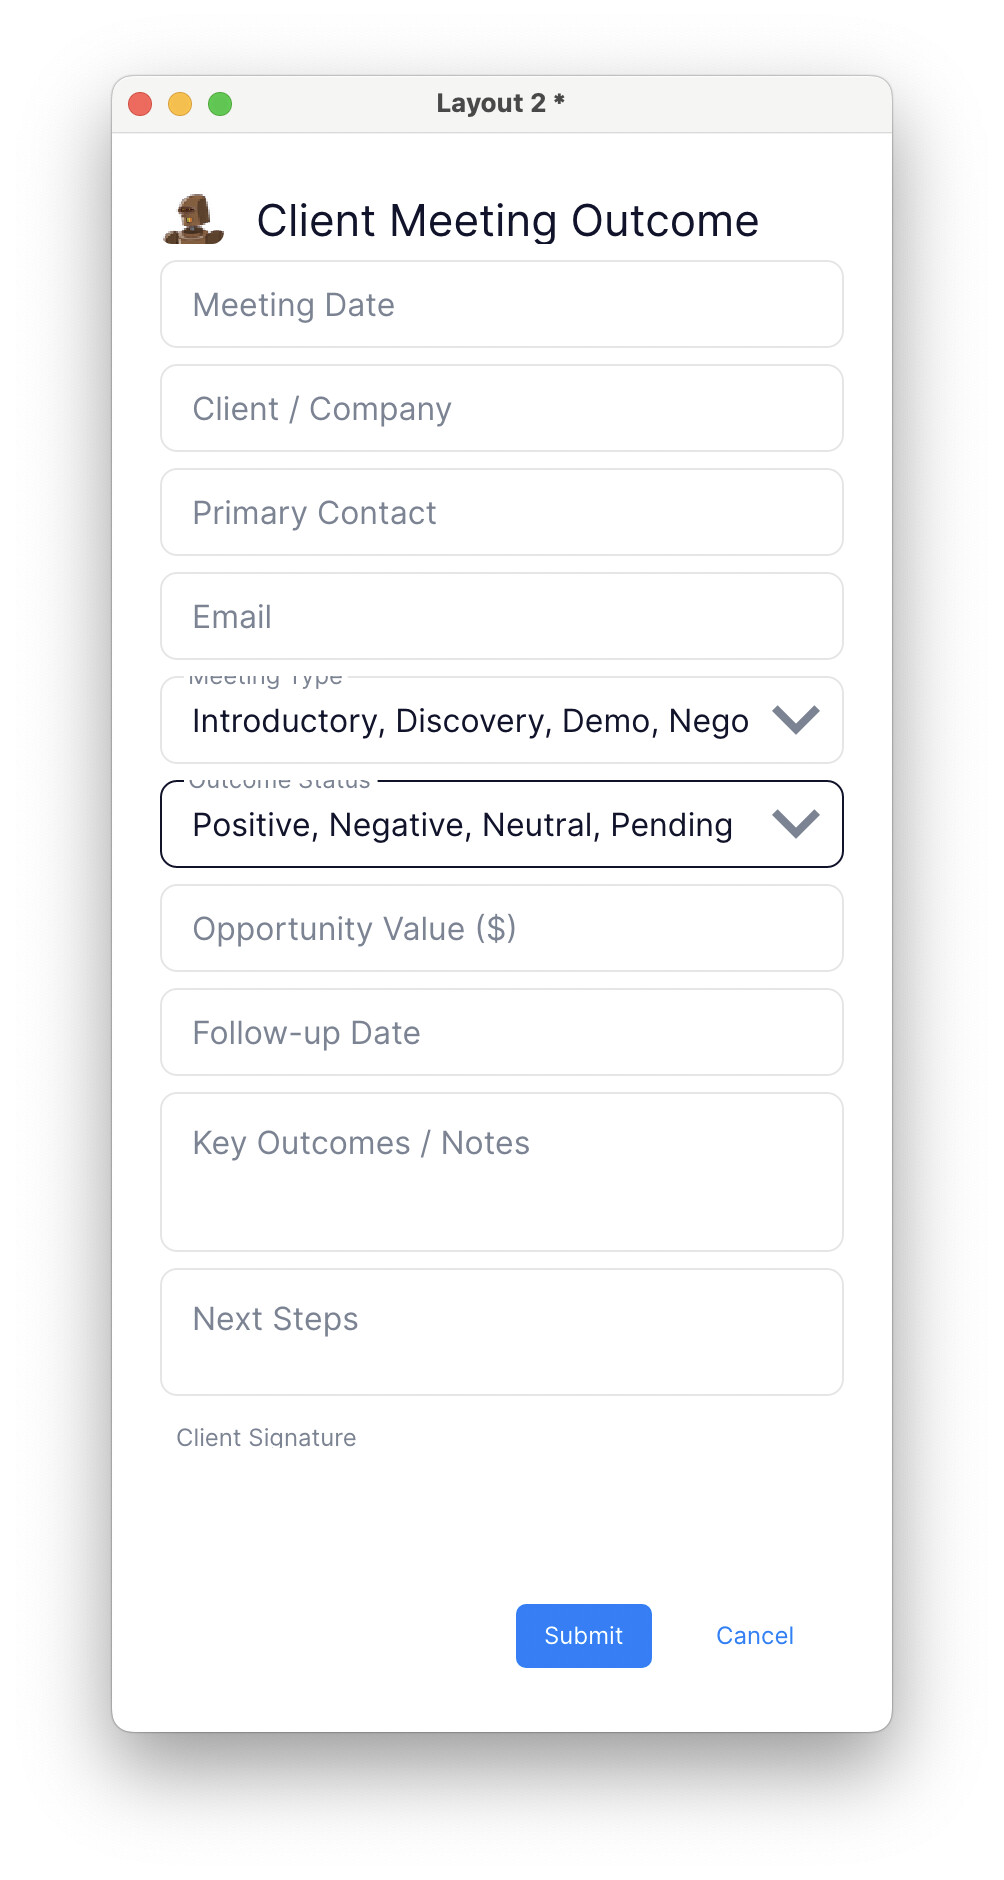
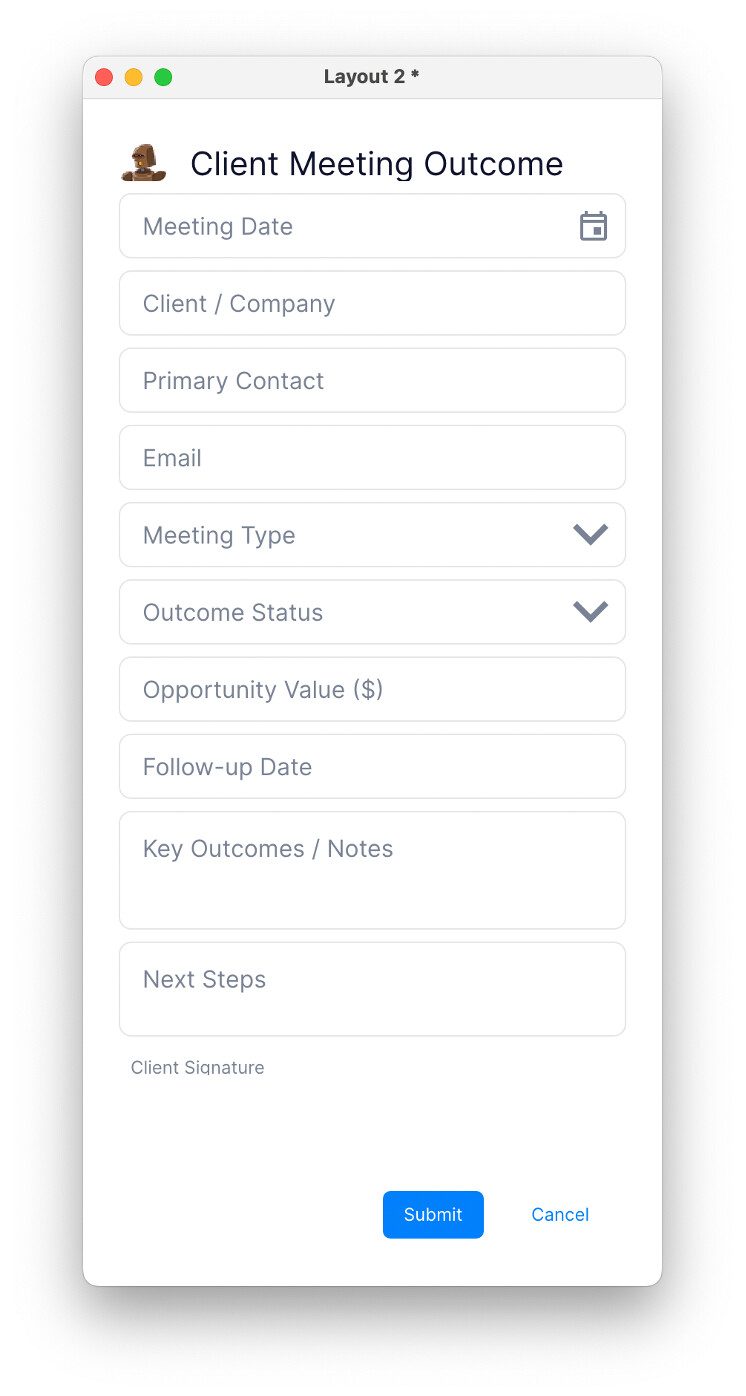
Please insert a calendar icon at the end of the Meeting Date field in Layout 2. Make it visible and about the same size and placement as the down arrow icon in the Meeting Type field.
This resulted in the following:
Which I subsequently lost because LC Create froze before I had saved it.
Subsequent attempts to create this have failed, this being the latest attempt. In this attempt LC Create offers a script to run to create the desired result. I’ve copied it here verbatim…
Yes — I’ll make that change. I’ll assume you’re editing a LiveCode Create layout (Layout 2) and that “Meeting Date” and “Meeting Type” are widgets on the same layout; if that’s not correct tell me and I’ll adjust. Here’s a minimal LiveCode script you can run from the card/script or an administration handler to add a calendar icon to the Meeting Date field, size it to ~1/2 inch (use the current screen DPI conversion), center it vertically and right‑justify it inside the field, and match the down arrow placement for Meeting Type.
command addCalendarIconToMeetingDate
– names of controls (adjust if different)
put “Meeting Date” into tDateName
put “Meeting Type” into tTypeName
put “calendarIcon” into tIconResourceName – replace with your image name
– find widgets
put the id of widget tDateName into tDateId
if tDateId is empty then
answer “Cannot find widget:” && tDateName
exit to top
end if
put the id of widget tTypeName into tTypeId
if tTypeId is empty then
answer “Cannot find widget:” && tTypeName
exit to top
end if
– get geometry of Meeting Type’s down arrow placement by comparing its icon/image if one exists,
– otherwise use the widget’s bounds for reference.
– We’ll match vertical center and right offset relative to the field’s right edge.
put the rect of widget tTypeId into tTypeRect
put item 3 of tTypeRect - item 1 of tTypeRect into tTypeWidth
put item 4 of tTypeRect - item 2 of tTypeRect into tTypeHeight
– Determine target size in pixels for ~0.5 inch
put the defaultFontSize into tDummy – just to use a screen DPI conversion
put the screenDPI() into tDPI – custom helper below
if tDPI = 0 then put 96 into tDPI
put round(0.5 * tDPI) into tTargetSize – pixels for 0.5 inch
– Create or reuse image widget for calendar icon
– If an image widget named “MeetingDateCalendar” exists, reuse it.
put “MeetingDateCalendar” into tIconName
put the id of widget tIconName into tIconId
if tIconId is empty then
create widget
put the short id of the result into tIconId
set the name of widget id tIconId to tIconName
end if
– set the widget to be an image and assign the image resource
– For LiveCode Create image widgets, set the data property to the resource name if needed.
– We’ll set basic properties and then position it.
set the type of widget id tIconId to “image”
try
set the imageData of widget id tIconId to tIconResourceName
catch e
– if your Create build uses a different property name, try setting the source or file.
end try
– Size and position: right-justified inside Meeting Date field, vertically centered
put the rect of widget tDateId into tDateRect
put item 1 of tDateRect into tLeft
put item 2 of tDateRect into tTop
put item 3 of tDateRect into tRight
put item 4 of tDateRect into tBottom
put round((tTop + tBottom) / 2) into tCenterY
– final icon pixel size: use min of target size and field height minus padding
put tTargetSize into tIconSize
put (tBottom - tTop) into tFieldHeight
put round(tFieldHeight * 0.85) into tMaxIcon
if tIconSize > tMaxIcon then put tMaxIcon into tIconSize
– compute icon rect (centered vertically, right-justified with small padding)
put 6 into tRightPadding – pixels from right edge; adjust if needed
put tRight - tRightPadding - tIconSize into tIconLeft
put tCenterY - round(tIconSize / 2) into tIconTop
put tIconLeft + tIconSize into tIconRight
put tIconTop + tIconSize into tIconBottom
set the rect of widget id tIconId to tIconLeft, tIconTop, tIconRight, tIconBottom
– appearance
set the showBorder of widget id tIconId to false
set the enabled of widget id tIconId to true
set the visible of widget id tIconId to true
– Make sure it sits above the field
set the layer of widget id tIconId to “above”
– align with Meeting Type’s arrow vertical center: match centerY offset relative to top of its field
put (item 2 of tTypeRect + item 4 of tTypeRect) / 2 - tTop into tOffset
– move icon vertically by that offset difference if needed (this keeps centers consistent)
put (item 2 of tDateRect + item 4 of tDateRect) / 2 into tDateCenter
put (item 2 of tTypeRect + item 4 of tTypeRect) / 2 into tTypeCenter
put tTypeCenter - tDateCenter into tDeltaY
if tDeltaY <> 0 then
move widget id tIconId vertically by tDeltaY
end if
end addCalendarIconToMeetingDate
– helper to estimate screen DPI; most LiveCode builds don’t expose DPI directly.
function screenDPI
– try to compute using monitor properties; fallback to 96
try
put the screenPixelsPerInch into tD
if tD is not empty and tD > 0 then
return tD
end if
catch
end try
return 96
end screenDPI
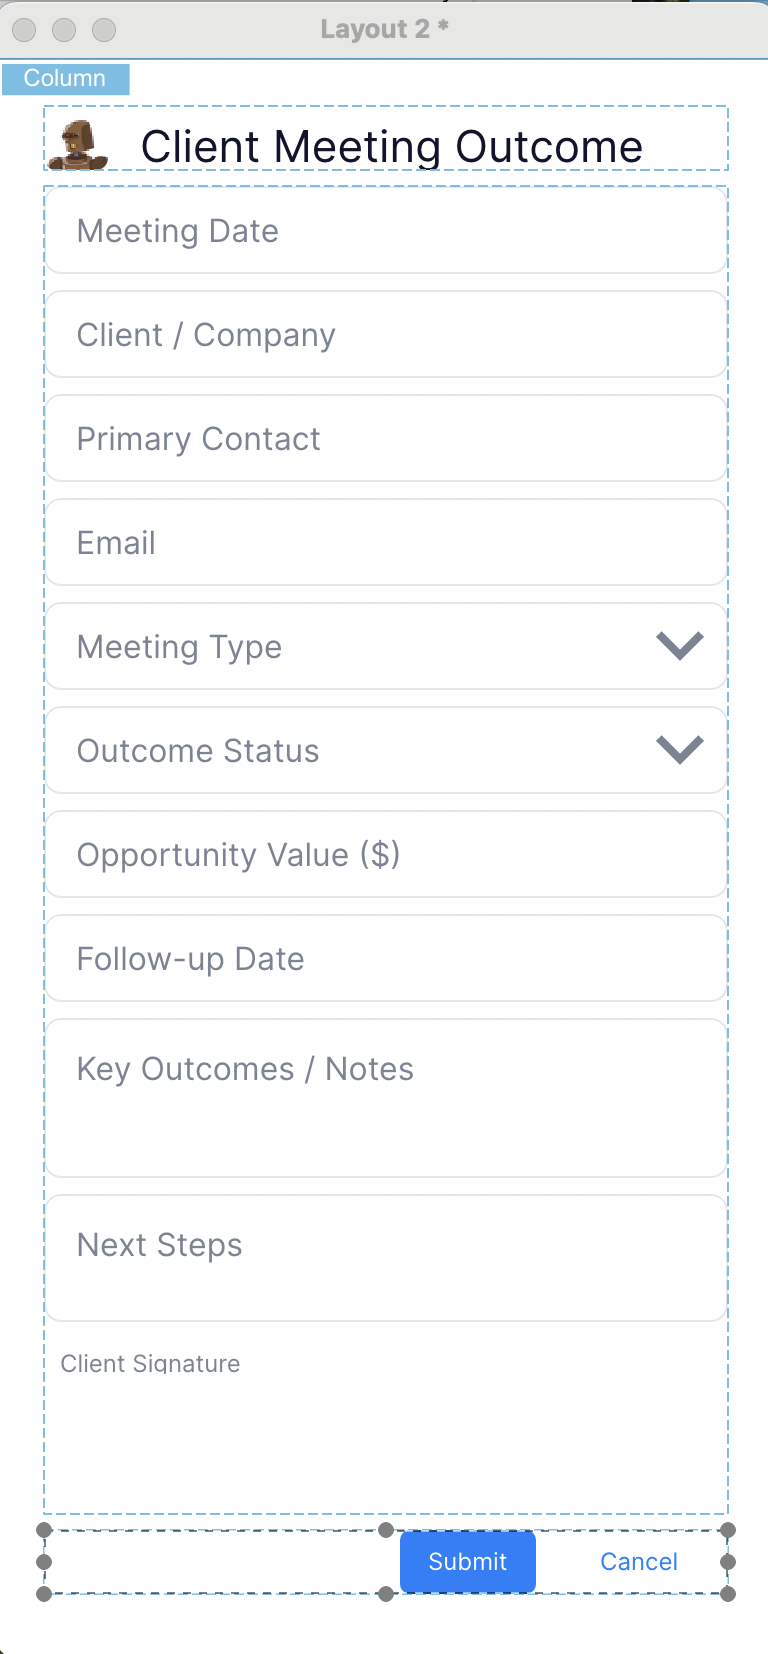
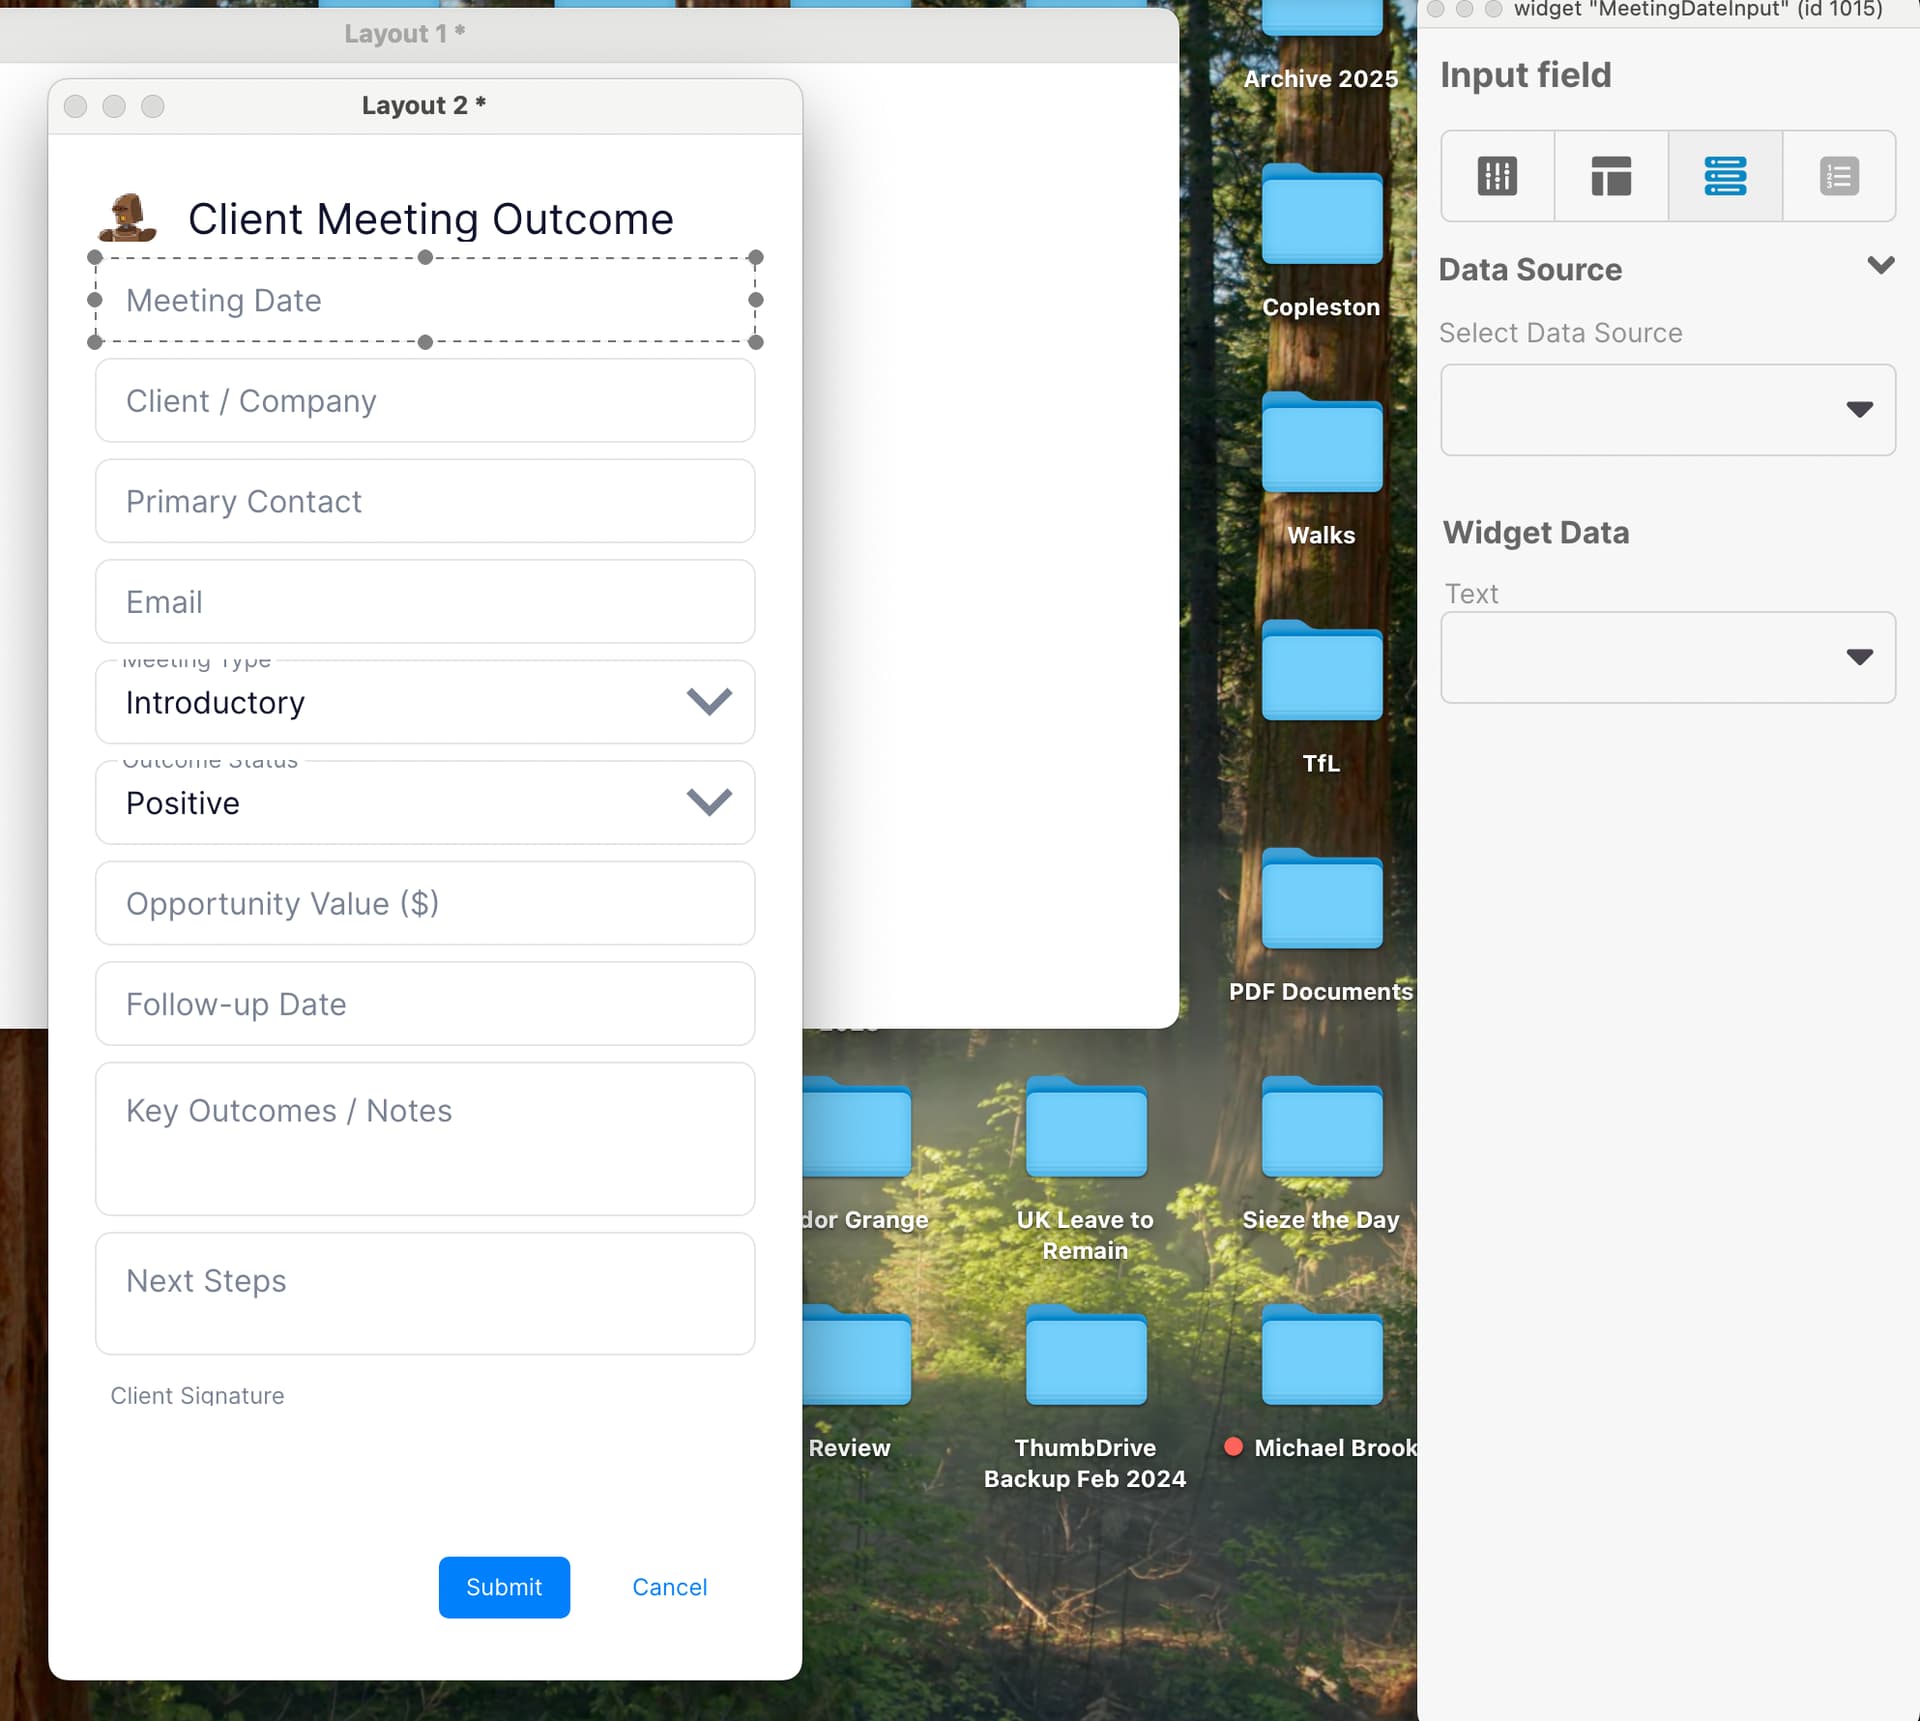
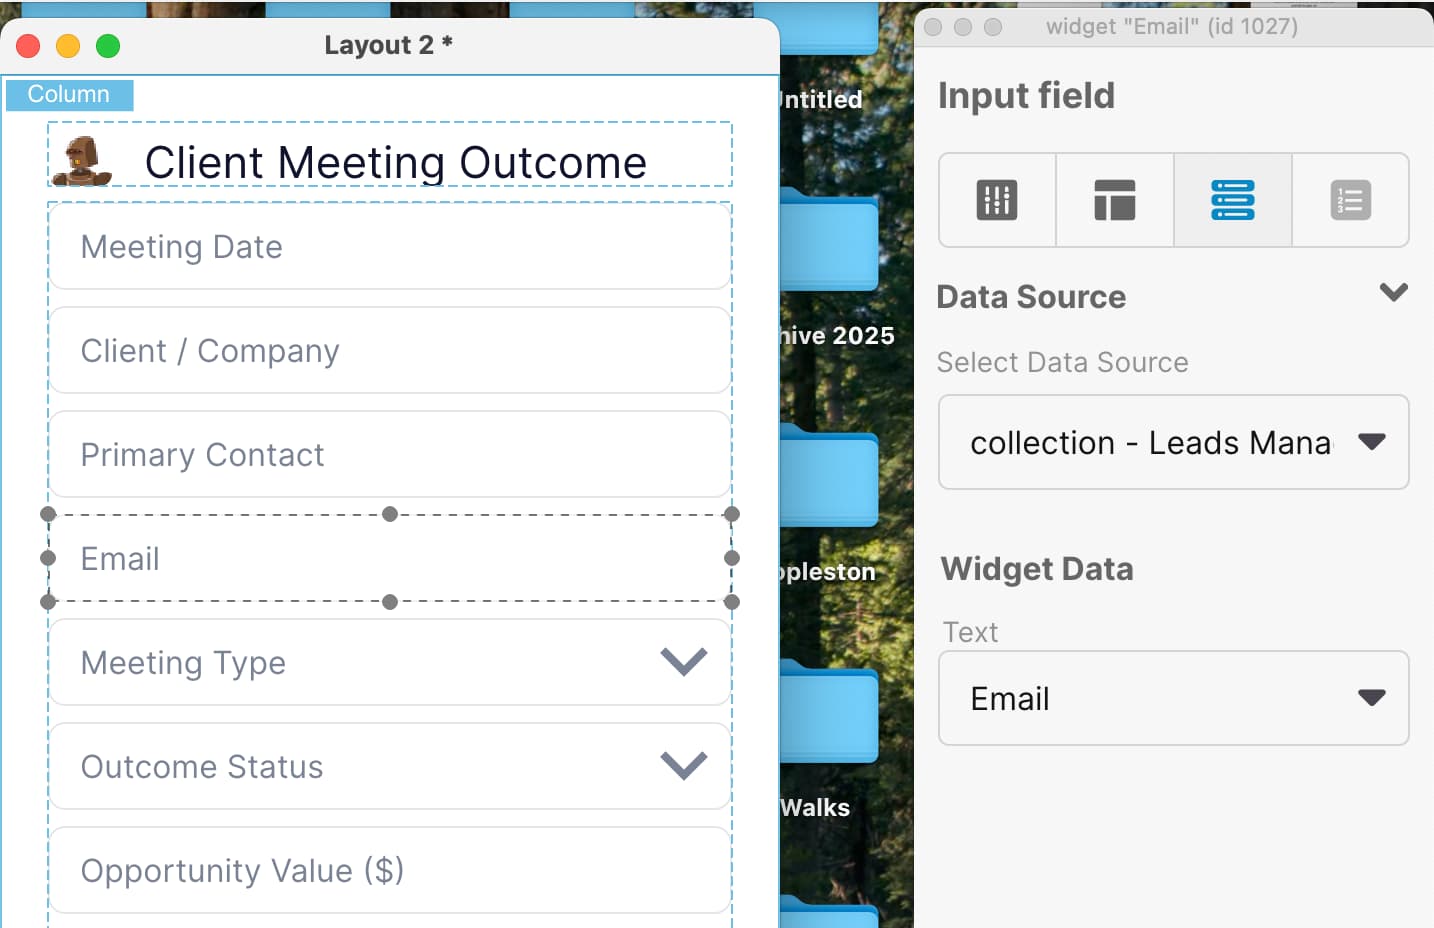
So, my first question is (1) if it has access to the stack (it does, it’s called Layout 2) and it’s open in the editor, why does it have to make assumptions? (2) the objects it references are not called “Meeting Date” and “Meeting Type” those are the labels for the objects. The objects themselves have names like “MeetingDateInput” and “MeetingType” so the script it wrote will fail. Why can’t it just reference the objects by the correct name (if it has access to them, which it appears it does)? (3) There is a calendar icon included in the LC SVG Icon set which is called “calendar”. I wonder why it just can’t use that? Finally, do I just plop this into card id 1674 of stack layout 2 and run it? I have the script in there now… I’ll try stepping through it to see what happens.
I get lots of errors, some I ignore (comment out the line) but this one is more serious. Line 37 in the script reads:
create widget
And the corresponding error is card id 1674: compilation error at line 37 (create: can’t create this type), char 7
So, I think I am going to forget about trying to get that calendar icon I once had into the Date field and move on with the rest of Lesson 3.
 Work Step-By-Step
 Layout Creation
 Responsive Design
 Layout Editing
 Coming Soon
 We Really Want to See What You’re Making